Adding or replacing the background image of your Client Hub
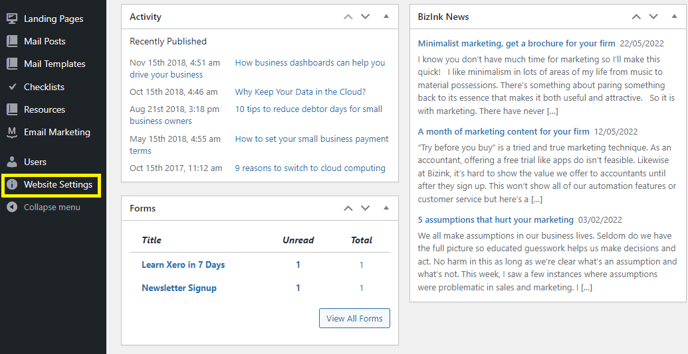
Log in to the back end of your client hub. Once logged in, scroll down, and on the lower left of your screen, you'll see the option for Website Setting.

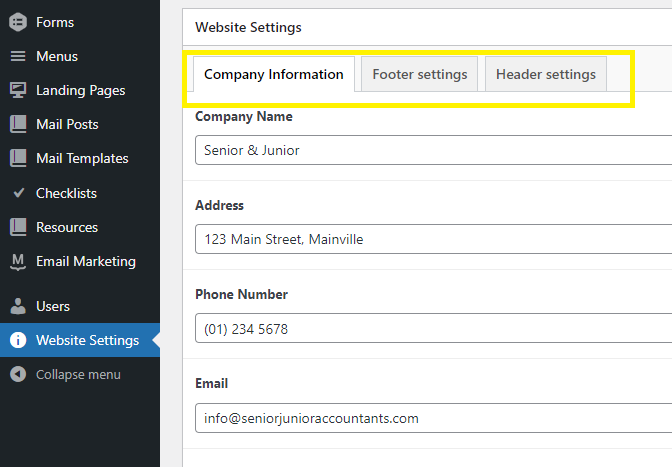
After clicking on the website settings, you will be prompted with the screen below.

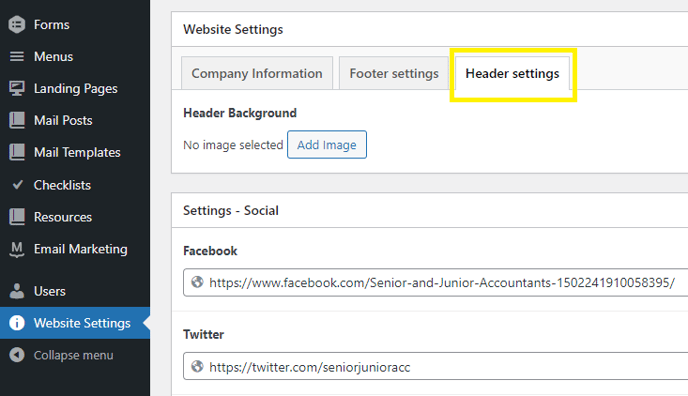
You have three options, and you will need to choose the 3rd one, the Header Settings.

Click on Add image, you can choose an existing image in your library or upload a new one. When uploading a new image, resizing it to 1900 width and 500 height is best.
After choosing the image that you want, click "Select" on the lower right screen and update the page.

Reload the client hub and you'll see the new background image you have chosen.