Add BizPress QuickBooks Resources to your website
Step-by-step instructions on how to add BizPress Xero Resources to a page on your website
-
Log in to your website and navigate to the dashboard.
-
Click on "Pages" on the left-hand menu, then click on "Add New" to create a new page.
-
Give your new page a title. e.g. QuickBooks Resources
-
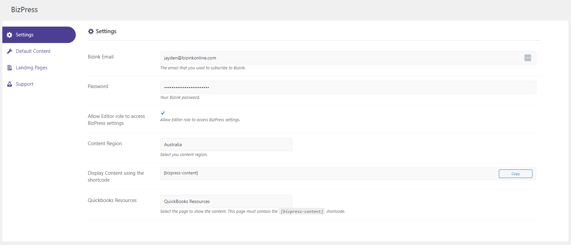
Copy [bizpress-content] and paste it into the content section below the title
- Save your changes by clicking on the "Publish" button
- Navigate to BizPress on the left-hand menu
- Under the settings section, use the drop down to assign the new page to the selected BizPress content. e.g QuickBooks Resources (see screenshot below)

Congratulations, you have added a new page to with BizPress QuickBooks Resources to your website, you can now also add this page to your website menu to make it easier for your visitors to find.