Add BizPress Business Terms to your website
Step-by-step instructions on how to add BizPress Business Terms Content to a page on your website
-
Log in to your website and navigate to the dashboard.
-
Click on "Pages" on the left-hand menu, then click on "Add New" to create a new page.
-
Give your new page a title. e.g. Key Dates
-
Copy [bizpress-content] and paste it into the content section below the title
- Save your changes by clicking on the "Publish" button
- Navigate to BizPress on the left-hand menu
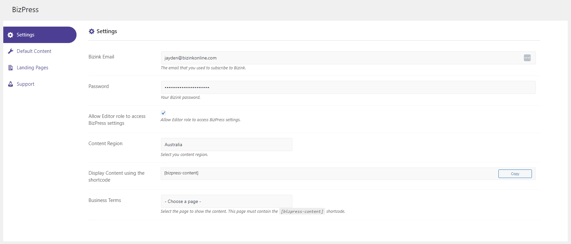
- Under the settings section, use the drop down to assign the new page to the selected BizPress content. e.g Key Dates (see screenshot below)

Here's an example for Key Dates
Congratulations, you have added a new page to with BizPress content to your website, you can now also add this page to your website menu to make it easier for your visitors to find.